Introduction
Gluten-free bread is a wonderful homemade alternative to traditional wheat bread, offering a soft texture, pleasant flavor, and satisfying bite without containing gluten. It is made using carefully selected gluten-free flours and starches that work together to create a loaf that is moist, tender, and suitable for everyday use. Whether you follow a gluten-free diet because of celiac disease, gluten sensitivity, wheat allergy, or simply want to explore different types of baking, this bread is an excellent choice.
Unlike traditional bread, which relies on gluten to trap air and develop elasticity, gluten-free bread requires a different approach. A combination of gluten-free flour blends, starches, psyllium husk, xanthan gum, and proper hydration helps produce a loaf that rises beautifully and slices neatly. Although gluten-free baking may seem intimidating at first, it becomes surprisingly simple once you understand the ingredients and the process.
One of the greatest advantages of making gluten-free bread at home is having complete control over the ingredients. Many commercial gluten-free breads contain preservatives, artificial flavors, excess sugar, or unnecessary additives to improve shelf life. Homemade bread allows you to choose fresh, wholesome ingredients while adjusting the flavor to suit your family’s preferences.
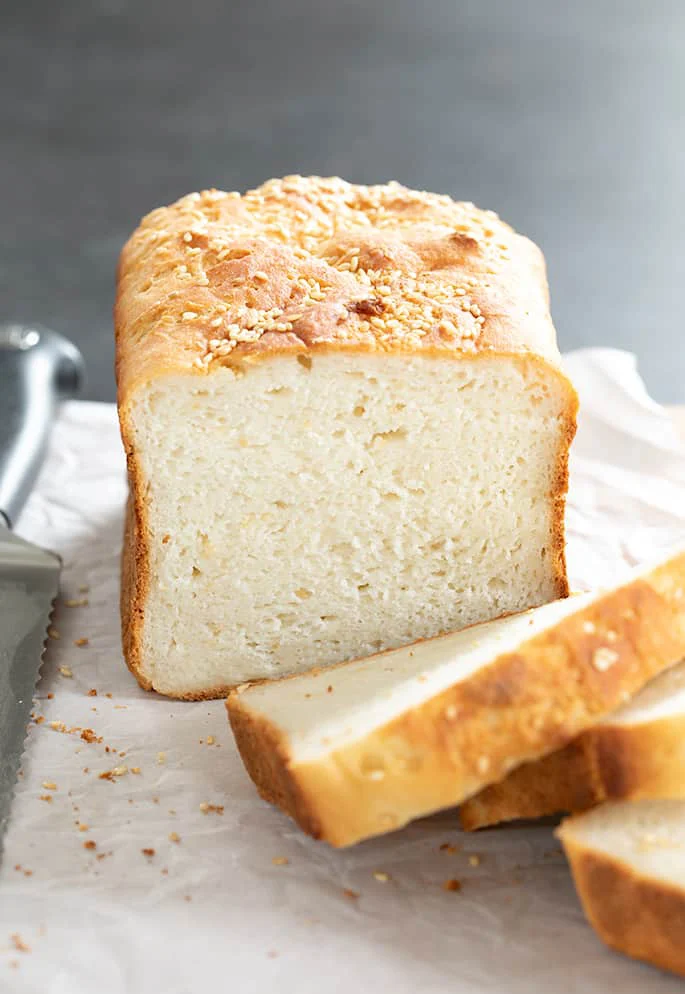
Freshly baked gluten-free bread has a pleasant aroma that fills the kitchen and creates the comforting feeling of homemade baking. The loaf comes out with a lightly golden crust and a soft interior that stays moist for several days when stored properly. Every slice can be enjoyed plain, toasted with butter, spread with jam, transformed into hearty sandwiches, or served alongside soups and salads.
This recipe uses a blend of brown rice flour, tapioca starch, potato starch, and gluten-free all-purpose flour to achieve a balanced texture. Brown rice flour provides body and nutrition, tapioca starch adds chewiness, while potato starch contributes softness and moisture. Psyllium husk acts as a natural binder, helping the dough hold together without gluten, while xanthan gum improves elasticity and structure.
Unlike wheat dough, gluten-free bread dough is much softer and resembles a thick batter rather than a firm dough. There is no need for traditional kneading, making the recipe easier than many classic bread recipes. Once mixed thoroughly, the dough is transferred directly into the loaf pan, allowed to rise, and baked until perfectly golden.
This bread is versatile enough for every meal of the day. Enjoy toasted slices for breakfast with butter and honey, prepare sandwiches for lunch, serve with soups for dinner, or use leftovers for French toast, stuffing, or homemade breadcrumbs. Because the loaf freezes well, you can bake one loaf and enjoy it over several weeks by freezing individual slices.
Homemade gluten-free bread also encourages experimentation. Herbs, seeds, cheese, dried fruit, spices, and nuts can all be incorporated into the dough, allowing countless variations while using the same basic recipe. Once you master this loaf, you will have a reliable foundation for creating many different styles of gluten-free bread.
The satisfaction of baking your own bread goes beyond the finished loaf. Watching the dough rise, smelling the bread as it bakes, and slicing into a warm loaf are experiences that make homemade bread special. Even those who do not follow a gluten-free diet often enjoy this bread because of its wholesome ingredients, fresh flavor, and tender texture.
Whether you are new to gluten-free baking or have years of experience, this recipe is designed to produce consistent results. With careful measuring, proper mixing, and a little patience during rising and cooling, you can create bakery-quality gluten-free bread right in your own kitchen.
Preparation Time
- Preparation Time: 20 minutes
- Mixing Time: 10 minutes
- First Rise: 50–60 minutes
- Baking Time: 45–50 minutes
- Cooling Time: 1 hour
- Total Time: Approximately 3 hours
Yield
Makes 1 standard loaf
Approximately 12–14 generous slices
Ingredients
Gluten-Free Flour Blend
- 2 cups gluten-free all-purpose flour blend
- 1 cup brown rice flour
- ½ cup tapioca starch
- ¼ cup potato starch
Binding Ingredients
2 tablespoons psyllium husk powder
2 teaspoons xanthan gum
Leavening
2 teaspoons instant yeast
1 tablespoon sugar or honey
Seasoning
1½ teaspoons salt
Wet Ingredients
- 2 large eggs, room temperature
- 2 tablespoons olive oil
- 1 teaspoon apple cider vinegar
- 1¾ cups warm water (about 110°F/43°C)
Optional Toppings
- Sesame seeds
- Poppy seeds
- Rolled gluten-free oats
- Sunflower seeds
- Pumpkin seeds
- Flaxseeds
Optional Mix-Ins
- Shredded cheddar cheese
- Parmesan cheese
- Fresh rosemary
- Fresh thyme
- Garlic powder
- Italian seasoning
- Caraway seeds
- Everything bagel seasoning
- Sun-dried tomatoes
- Chopped olives
- Chopped walnuts
- Pecans
- Dried cranberries
- Raisins
- Ground cinnamon
- Mixed herbs
Equipment Needed
Large mixing bowl
- Medium bowl
- Stand mixer with paddle attachment or electric hand mixer
- Measuring cups and spoons
- Kitchen scale (recommended)
- Rubber spatula
- 9×5-inch loaf pan
- Parchment paper
- Wire cooling rack
- Instant-read thermometer (optional)
Understanding the Ingredients
Gluten-Free Flour Blend
This forms the main structure of the loaf and contains several balanced gluten-free flours.
Brown Rice Flour
Adds mild nutty flavor, strength, and nutrition.
Tapioca Starch
Creates elasticity and chewiness.
Potato Starch
Keeps the bread moist and soft.
Psyllium Husk
Acts like gluten by trapping moisture and improving flexibility.
Xanthan Gum
Strengthens the dough and reduces crumbling.
Yeast
Creates air pockets and allows the bread to rise.
Eggs
Provide protein, moisture, richness, and additional structure.
Olive Oil
Keeps the bread tender and fresh.
Apple Cider Vinegar
Improves yeast activity and helps create a lighter loaf.
Warm Water
Hydrates the flour and activates the psyllium husk.
Why This Recipe Works
- Every ingredient serves a purpose. Instead of relying on one flour, this recipe combines several ingredients that complement one another.
- Brown rice flour creates body.
- Potato starch provides softness.
- Tapioca starch improves flexibility.
- Psyllium husk creates stretch.
- Xanthan gum prevents crumbling.
- Eggs strengthen the loaf.
- Olive oil keeps the crumb moist.
- The combination results in bread that is easy to slice and enjoyable for several days after baking.
Step-by-Step Instructions
Step 1: Prepare the Pan
- Lightly grease a standard loaf pan.
- Line it with parchment paper for easier removal if desired.
- Preheat the oven only after the dough has nearly finished rising.
Step 2: Mix Dry Ingredients
- Place into a large bowl:
- Gluten-free flour blend
- Brown rice flour
- Potato starch
- Tapioca starch
- Psyllium husk
- Xanthan gum
- Instant yeast
- Sugar
- Salt
- Whisk thoroughly for about two minutes.
- Even mixing prevents dense spots in the finished loaf.
Step 3: Combine Wet Ingredients
- In another bowl whisk together:
- Warm water
- Eggs
- Olive oil
- Apple cider vinegar
- Mix until completely smooth.
Step 4: Form the Dough
- Gradually pour the wet mixture into the dry ingredients.
- Mix on medium speed for 5–7 minutes.
- The dough should become smooth, sticky, and thick.
- Unlike traditional bread, it will not form a firm ball.
- Avoid adding extra flour.
Step 5: Rest the Dough
- Allow the dough to sit for five minutes.
- This gives the psyllium husk time to absorb moisture.
- The dough will thicken naturally.
Step 6: Fill the Pan
- Transfer the dough into the prepared loaf pan.
- Smooth the surface with a damp spatula.
- Sprinkle seeds or oats over the top if desired.
Step 7: First Rise
- Cover loosely with plastic wrap or a clean towel.
- Place somewhere warm.
- Allow the dough to rise for 50–60 minutes.
- The dough should rise close to the top of the pan.
- Do not over-proof.
Step 8: Bake
- Preheat oven to 375°F (190°C).
- Bake for 45–50 minutes.
- If the crust browns too quickly, loosely cover with foil.
- The bread is done when the internal temperature reaches approximately 205–210°F.
Step 9: Cooling
- Remove from the oven.
- Leave in the pan for 10 minutes.
- Transfer to a cooling rack.
- Allow to cool completely before slicing.
- Cooling helps the crumb finish setting.
Texture
- A successful loaf should have:
- A lightly crisp crust
- Soft interior
- Tender crumb
- Even air pockets
- Moist texture
- Flexible slices
- Minimal crumbling
- Excellent toastability
Flavor Variations
Herb Bread
Add rosemary, thyme, oregano, basil, garlic powder, and parsley.
Cheese Bread
Mix cheddar, mozzarella, parmesan, and black pepper.
Garlic Bread
Add roasted garlic and parsley.
Cinnamon Raisin Bread
Mix raisins, cinnamon, nutmeg, and brown sugar.
Seeded Bread
Include flaxseed, sunflower seeds, pumpkin seeds, sesame seeds, and chia seeds.
Multigrain Bread
Add millet, quinoa flakes, buckwheat flakes, and certified gluten-free oats.
Sweet Breakfast Bread
Mix dried cranberries, orange zest, cinnamon, and chopped pecans.
Storage
- Store covered at room temperature for two days.
- Refrigerate for up to five days.
- Freeze slices individually for three months.
- Toast frozen slices directly without thawing.
Serving Suggestions
- Serve with butter.
- Spread with homemade jam.
- Use for grilled cheese.
- Prepare turkey sandwiches.
- Make avocado toast.
- Serve beside tomato soup.
- Pair with vegetable soup.
- Use for French toast.
- Toast with peanut butter.
- Top with cream cheese and smoked salmon.
- Serve with scrambled eggs.
- Use for breakfast sandwiches.
- Make homemade croutons.
- Prepare stuffing.
- Grind into breadcrumbs.
Nutritional Benefits
- Gluten-free bread is naturally suitable for those avoiding gluten.
- Brown rice flour contributes minerals and complex carbohydrates.
- Eggs supply protein.
- Olive oil contains healthy fats.
- Psyllium husk provides fiber that supports digestion.
- Homemade bread avoids many preservatives found in commercial products.
- The recipe can easily be adapted with seeds and whole grains for additional nutrition.
Helpful Tips
- Measure ingredients accurately.
- Use room-temperature eggs.
- Always use warm—not hot—water.
- Mix thoroughly.
- Do not knead like traditional bread.
- Allow enough rising time.
- Bake until fully cooked.
- Cool completely.
- Slice with a serrated knife.
- Freeze extra slices.
- Toast before serving for the best texture.
Troubleshooting
Bread Didn’t Rise
- The yeast may have expired.
- The water may have been too hot or too cold.
- The room may have been too cool.
Bread Is Dense
- The dough may have been under-mixed.
- Measurements may have been inaccurate.
- The dough may have lacked hydration.
Bread Is Gummy
- It may need additional baking time.
- The loaf may have been sliced too soon.
Bread Is Dry
- Too much flour may have been added.
- The loaf may have baked too long.
Bread Crumbles
- Insufficient psyllium husk or xanthan gum.
- Improper flour ratio.
- Under-mixing.
Frequently Asked Questions
Can I make this dairy-free?
Yes. This recipe is naturally dairy-free unless cheese is added.
Can I replace eggs?
Yes. Flax eggs or commercial egg replacers work well, though the loaf may be slightly denser.
Can I use a bread machine?
Yes, if it includes a gluten-free cycle.
Can I add seeds?
Absolutely. Seeds improve both nutrition and texture.
Can I make rolls instead of a loaf?
Yes. Divide the dough into greased muffin cups or roll molds and reduce the baking time.
Can I prepare the dough ahead?
It is best baked immediately after rising, but the baked loaf freezes very well.