Seeded No-Knead Jar Bread (Long Detailed Recipe)
This is a simple rustic bread made without kneading. It is mixed in a jar or bowl, left to ferment slowly, and baked into a dense, flavorful loaf loaded with seeds. It is hearty, nutritious, and requires very little hands-on effort.
PART 1: INGREDIENTS
1. Dry ingredients
- 2 1/2 cups all-purpose flour (or bread flour for better structure)
- 1 teaspoon salt
- 1 teaspoon sugar (optional, helps fermentation slightly)
- 1 teaspoon instant yeast
2. Seeds (total about 1/2 to 3/4 cup)
You can mix and match depending on availability:
- Sesame seeds
- Sunflower seeds
- Pumpkin seeds
- Flax seeds
- Chia seeds
- Nigella seeds (optional for flavor)
3. Liquid
- 1 to 1 1/4 cups warm water (adjust as needed)
- 1 tablespoon olive oil (optional, improves softness)
PART 2: WHY THIS IS CALLED “NO-KNEAD JAR BREAD”
This bread does not require kneading. Instead, time and hydration develop gluten naturally. Mixing can be done in a jar or bowl, making it simple and beginner-friendly.
The long fermentation process replaces physical kneading.
PART 3: MIXING THE DOUGH
Step 1: Combine dry ingredients
In a large jar or bowl:
- Add flour
- Add salt
- Add yeast
- Add sugar
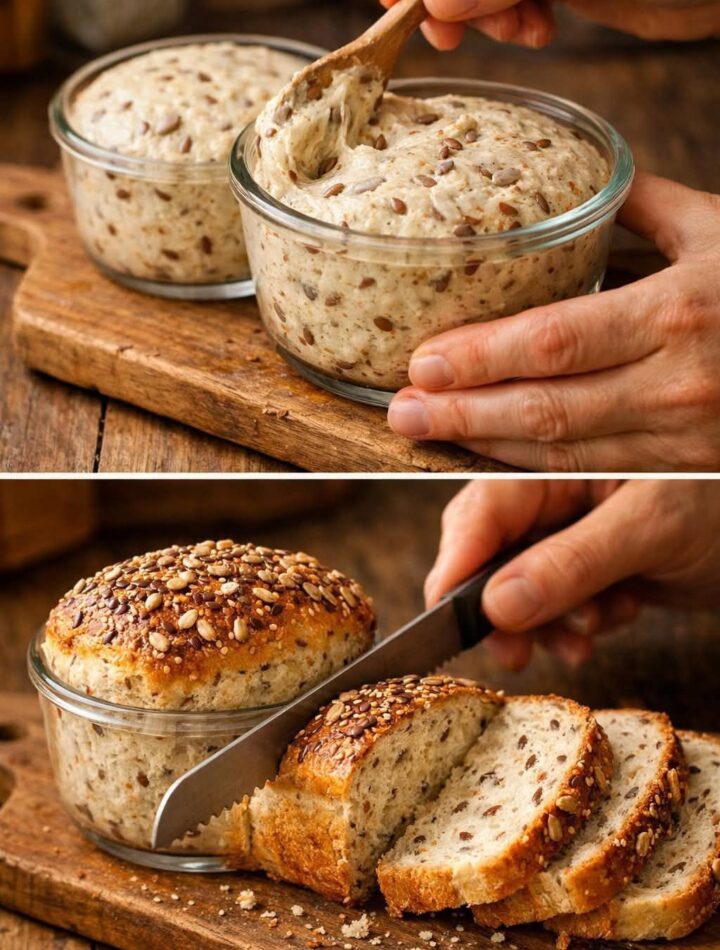
- Add all seeds
Mix everything thoroughly so seeds are evenly distributed.
Step 2: Add water
- Pour in warm water gradually
- Add olive oil if using
- Stir using a spoon or spatula until no dry flour remains
The dough should be sticky and rough, not smooth.
Important:
Do not try to knead. Sticky texture is correct.
Step 3: Rest the dough
Cover the jar or bowl loosely with a lid or cloth.
Let it rest at room temperature for:
- 12 to 18 hours (overnight or longer)
During this time:
- Yeast ferments the dough
- Gluten develops naturally
- Dough rises and becomes airy
PART 4: UNDERSTANDING FERMENTATION
After resting:
- Dough will be bubbly
- It will double or slightly more in volume
- Smell will be slightly yeasty and sour
If it hasn’t risen:
- Room temperature may be too cold
- Yeast may be inactive
PART 5: SHAPING THE DOUGH
Step 4: Prepare for shaping
Lightly flour a surface. The dough will be sticky and soft.
Step 5: Shape gently
- Pour dough onto floured surface
- Fold edges toward center
- Shape into a rough round or oval
Do not over-handle.
Step 6: Final rest
Let shaped dough rest for:
- 30 to 60 minutes
Cover lightly with cloth to prevent drying.
This step improves oven spring (rise in oven).
PART 6: PREPARING TO BAKE
Step 7: Preheat oven
Preheat oven to:
- 220°C (428°F)
If using a baking tray or Dutch oven, preheat it inside the oven.
Step 8: Optional seed topping
You can enhance crust by:
- Brushing surface lightly with water or milk
- Sprinkling extra seeds on top
This gives a crunchy seeded crust.
PART 7: BAKING
Step 9: Bake initial stage
Place dough in oven:
- Bake at 220°C for 20 minutes
This creates oven spring and crust formation.
Step 10: Reduce heat
After 20 minutes:
- Lower temperature to 180–190°C
- Bake for another 20–25 minutes
The bread should:
- Turn deep golden brown
- Sound hollow when tapped
PART 8: COOLING
Step 11: Cool properly
Remove bread and place on wire rack.
Cool for at least:
- 1 hour before slicing
Why:
Cutting too early traps steam and makes bread gummy inside.
FINAL RESULT
You will get:
- Rustic crusty bread exterior
- Soft, slightly chewy interior
- Nutty flavor from mixed seeds
- Light tang from fermentation
- Dense but airy structure
IMPORTANT TIPS
- Do not over-add flour; sticky dough is necessary
- Longer fermentation improves flavor significantly
- Use a warm environment for better rise
- Always cool before slicing
- Seeds can be toasted lightly before adding for stronger flavor
VARIATIONS YOU CAN TRY
- Whole wheat seeded jar bread
- Garlic and herb seeded version
- Honey oat seeded bread
- Cheese and seed rustic loaf