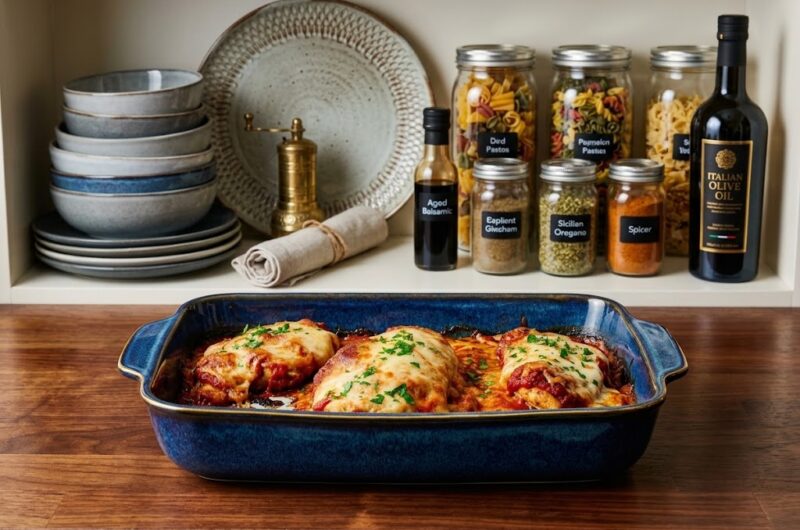
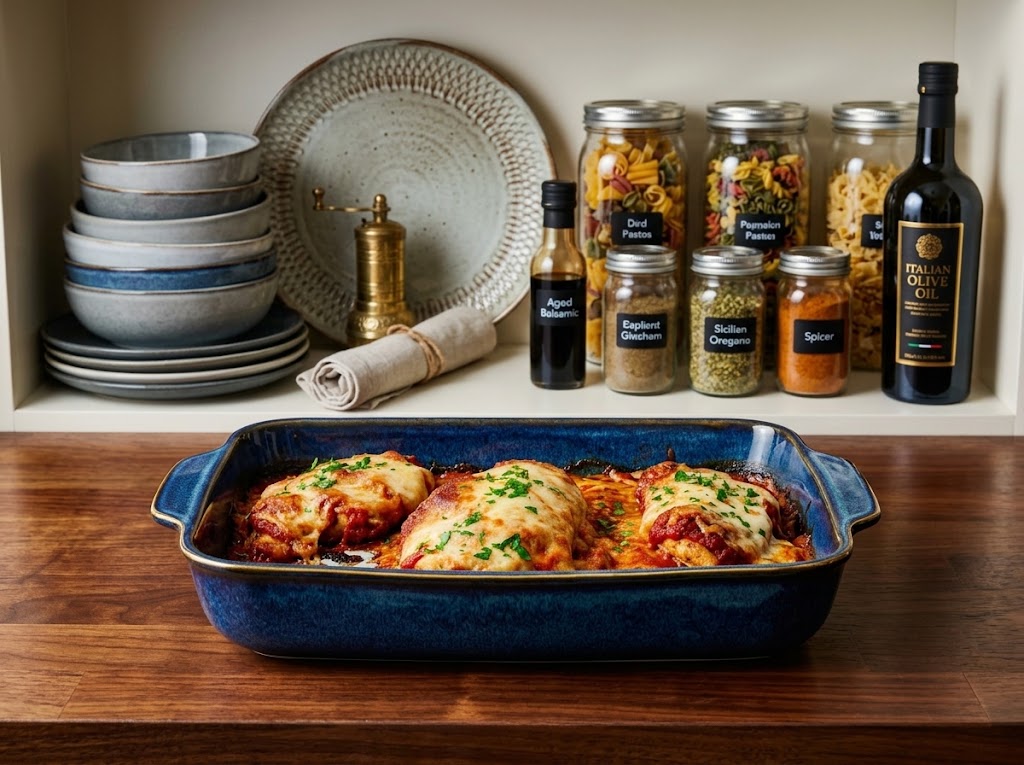
Keto chicken parmesan is a low-carb version of the familiar Italian-inspired chicken dinner, made with a crisp pork rind and Parmesan coating instead of traditional breadcrumbs. Tender chicken is browned in a skillet, covered with marinara sauce and mozzarella, then placed under the broiler until the cheese melts and turns bubbly.
This keto chicken parmesan recipe is a good choice when you want a filling dinner without using regular flour or breadcrumbs. The coating adds a crisp texture, while Parmesan brings a salty, savory flavor that works well with the chicken. Marinara sauce and melted mozzarella finish the dish with the familiar taste of chicken Parmesan.
The recipe takes about 35 minutes from start to finish, including 20 minutes of preparation and 15 minutes of cooking. Because the chicken is sliced or pounded to an even thickness, it cooks relatively quickly in the skillet. The final broiling step only needs enough time to melt and lightly brown the mozzarella.
Why This Chicken Parmesan Is Keto Friendly
- Traditional chicken Parmesan is often prepared with breadcrumbs or flour, which can add a significant amount of carbohydrates. This recipe replaces the usual breadcrumb coating with crushed pork rinds and grated Parmesan cheese, creating a crisp coating while keeping the carbohydrate count low.
- The recipe also uses a measured amount of marinara sauce and mozzarella cheese. Together with the chicken, egg, heavy cream, and seasonings, these ingredients create a substantial main course. The provided nutrition information lists 6 grams of carbohydrates per serving.
- With 50 grams of protein per serving, this chicken Parmesan can also fit comfortably into a protein-focused meal plan. However, the recipe is categorized as Keto Recipes because the main purpose of the ingredient combination is to create a low-carb alternative to traditional breaded chicken Parmesan.
Choosing the Right Chicken
- The recipe calls for boneless, skinless chicken breasts or chicken tenderloins. Chicken breasts should be sliced lengthwise if they are thick, while tenderloins can usually be used with little preparation. The goal is to create pieces that are similar in thickness so they cook evenly.
- If the chicken breasts are particularly thick, gently pound them to an even thickness after slicing. This helps prevent the outside from becoming overly browned before the center is fully cooked. Even pieces also make it easier to assemble the finished dish.
- Using boneless and skinless chicken keeps the preparation straightforward. It also provides plenty of lean protein to balance the richer cheese and pork rind coating. Make sure the chicken is properly cooked before moving it to the baking sheet.
Preparing the Egg Mixture
- The egg mixture acts as the first layer of the coating. Whisk one large egg with one tablespoon of heavy cream in a medium bowl until the mixture is thoroughly combined. The cream adds richness while helping the coating adhere to the chicken.
- Keep the mixture smooth and well blended before dipping the chicken. Each piece should be coated with the egg mixture before being moved into the dry coating. This two-step process helps the pork rind and Parmesan mixture stick evenly to the surface.
- It is helpful to prepare the egg mixture before handling the dry coating. Having both bowls ready makes the dipping process easier and keeps the preparation organized.
Making the Keto Chicken Coating
- The coating combines crushed pork rinds with grated Parmesan cheese, garlic powder, Italian seasonings, salt, and optional crushed red pepper. This mixture replaces the breadcrumbs normally used for breaded chicken Parmesan.
- Pork rinds provide the crisp texture that makes the chicken satisfying, while Parmesan gives the coating a deeper cheese flavor. Garlic powder and Italian seasonings add savory flavor without requiring a long list of ingredients.
- If you enjoy some heat, the recipe includes crushed red pepper as an optional ingredient. If you prefer a milder chicken Parmesan, simply leave the optional red pepper out while keeping the rest of the coating unchanged.
How to Coat the Chicken
- Take one prepared piece of chicken and dip it into the egg and heavy cream mixture. Turn it so both sides are covered. Allow any excess egg mixture to drip back into the bowl before transferring the chicken to the coating.
- Place the chicken into the pork rind mixture and press the coating gently onto both sides. Make sure the entire surface is covered before moving the piece to a clean plate or directly into the skillet.
- Repeat the process with each piece of chicken. Working one piece at a time makes it easier to keep the coating even and prevents the dry mixture from becoming overly wet.
Cooking the Breaded Chicken
- Heat one tablespoon of ghee, avocado oil, or olive oil in a large skillet over medium-high heat. Once the skillet is hot, carefully add the coated chicken pieces. Give each piece enough room to cook without being tightly packed together.
- Cook the chicken for approximately 3 to 5 minutes on each side. The coating should become golden brown, and the chicken should be cooked through. The exact cooking time depends on the thickness of the chicken pieces.
- Avoid turning the chicken repeatedly. Allow one side to develop a golden crust before carefully flipping it. This helps keep the pork rind coating attached to the chicken and gives the finished dish a better texture.
Getting a Crisp Coating
- A good keto chicken Parmesan depends on a coating that stays crisp after cooking. Using properly crushed pork rinds gives the chicken a textured exterior, while Parmesan helps add additional browning and flavor.
- Make sure the chicken is evenly coated before placing it in the skillet. Thin or bare spots may cook differently from the rest of the surface. Pressing the coating gently onto the chicken can help it stay in place.
- The skillet should be hot enough to brown the coating, but the heat should not be so aggressive that the outside burns before the chicken cooks. Medium-high heat provides the starting point specified in the recipe.
Adding Marinara Sauce
- Once the chicken is cooked, transfer each piece to a baking sheet. Spoon marinara sauce over the chicken, making sure each piece receives an even layer. The sauce adds moisture and tomato flavor while preparing the chicken for the melted cheese topping.
- Because marinara sauce contains carbohydrates, using the specified one cup helps maintain the balance of the original recipe. If you are following a strict keto diet, check the nutrition information on your particular marinara sauce because packaged products can vary.
- The sauce should be added after the chicken has been browned rather than during the skillet cooking stage. This allows the pork rind coating to develop its crisp texture before the moist marinara is placed on top.
Adding the Mozzarella Cheese
- Sprinkle the shredded mozzarella cheese over the marinara-covered chicken. The recipe uses three-quarter cup of mozzarella, which provides enough cheese to cover the chicken without overwhelming the tomato sauce and crisp coating.
- Mozzarella is particularly useful for the final stage because it melts smoothly and develops a bubbly surface under the broiler. Spread it as evenly as possible so every piece receives a portion of the melted cheese.
- Once the cheese has been added, the chicken is ready for the broiler. Keep the baking sheet positioned safely under the heat and watch closely because the cheese can brown quickly.
Finishing Under the Broiler
- The oven should be preheated to the broil setting before the chicken is transferred under the heat. Broiling provides the intense top heat needed to melt the mozzarella and create the bubbling finish associated with chicken Parmesan.
- The chicken only needs to remain under the broiler until the cheese is melted and bubbly. Because broilers vary in strength, keep an eye on the cheese rather than relying on a fixed time.
- Remove the baking sheet once the mozzarella has reached the desired melted and lightly golden appearance. Allow the chicken to settle briefly before serving so the hot cheese and sauce are easier to handle.
What Makes This Recipe Different
- The main difference between this keto chicken Parmesan and a traditional version is the coating. Instead of conventional breadcrumbs, crushed pork rinds and Parmesan create the crisp outer layer.
- The rest of the dish keeps the familiar combination of tomato sauce and melted mozzarella. This means you can enjoy the flavors associated with chicken Parmesan while avoiding the regular breadcrumb coating.
- The recipe also uses a skillet followed by a short broiling step. This approach gives the chicken a browned exterior before the marinara and mozzarella are added, helping create contrast between the crisp coating and creamy melted cheese.
Managing the Cooking Process
- For a smooth cooking process, prepare the chicken, egg mixture, coating, and skillet before beginning. Once the chicken enters the coating mixture, things move quickly. Having everything ready prevents the breaded chicken from sitting too long before cooking.
- It is also useful to preheat the oven to broil before the chicken is finished in the skillet. That way, the cooked chicken can move directly to the baking sheet and then under the broiler once the marinara and mozzarella are added.
- Keep the final broiling stage short and watch carefully. The goal is to melt the mozzarella and make it bubbly, not to continue cooking the chicken for a long period.
Serving Keto Chicken Parmesan
- Serve the chicken Parmesan hot while the mozzarella is still melted. The crisp coating contrasts nicely with the warm marinara sauce and soft cheese. Each serving contains a substantial amount of protein, making the dish suitable as a filling main course.
- For a keto meal, it can be paired with suitable low-carb vegetables or a simple salad. Since the chicken already includes sauce and cheese, the side dish can be kept light and uncomplicated.
- The recipe provides four servings. Divide the cooked chicken evenly so each portion receives a balanced amount of chicken, coating, marinara sauce, and mozzarella.
Common Preparation Mistakes
- One common problem is using chicken pieces that are too thick. Thick chicken can take longer to cook and may brown unevenly. Slicing or pounding the chicken to an even thickness helps solve this issue.
- Another issue can occur when the coating is not pressed onto the chicken properly. Make sure the chicken is fully covered with the egg mixture before dredging it in the pork rind and Parmesan mixture.
- Over-broiling can also cause the mozzarella to brown too quickly. Keep a close eye on the chicken during the final stage and remove it once the cheese is melted and bubbling.
Keto Chicken Parmesan
 Recipe by admin1
Parmesan-coated chicken topped with marinara sauce and melted mozzarella cheese. This easy keto chicken Parmesan is a low-carb take on a classic Italian-inspired dinner.
4
servings20
minutes15
minutes412
kcal35
minutesIngredients
1 ½ lbs boneless skinless chicken breasts or tenderloins
1 large egg
1 tablespoon heavy cream
- Coating:
1 cup crushed pork rinds
1/2 cup grated Parmesan cheese
1 teaspoon garlic powder
1 teaspoon Italian seasonings
1/2 teaspoon salt
1/2 teaspoon crushed red pepper (optional)
1 tablespoon ghee, avocado, or olive oil
1 cup marinara sauce
3/4 cup shredded mozzarella cheese
Directions
- Preheat oven to the broil setting.
- Prepare the chicken breasts by slicing them lengthwise if they’re thick or pounding them to an even thickness.
- In a medium bowl, whisk together the egg and heavy cream until thoroughly combined.
- In a separate bowl, mix the crushed pork rinds, Parmesan cheese, garlic powder, Italian seasonings, salt, and optional crushed red pepper.
- Dip each piece of chicken into the egg mixture, then coat it evenly with the pork rind mixture.
- Heat ghee or oil in a large skillet over medium-high heat. Cook the chicken for 3-5 minutes per side until golden brown and cooked through.
- Transfer the cooked chicken to a baking sheet, top each piece with marinara sauce, and sprinkle with mozzarella cheese.
- Broil the chicken until the cheese is melted and bubbly.
- Serve hot and enjoy your delicious keto chicken parmesan!
Nutrition Facts
- Calories: 412kcal
- Fat: 20g
- Carbohydrates: 6g
- Protein: 50g
- Calcium: 247mg
- Iron: 2mg