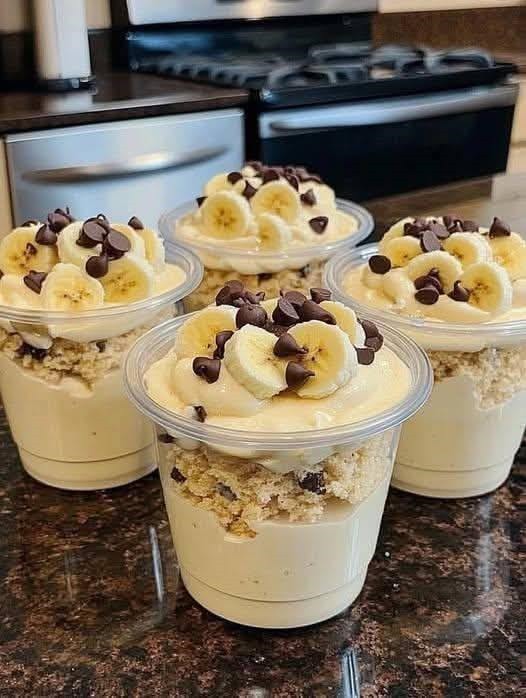
This is a healthier, high-protein version of classic banana pudding. It is creamy, naturally sweet, and packed with protein from Greek yogurt, milk, and protein powder while still keeping the traditional dessert taste.
PART 1: INGREDIENTS
1. Protein pudding base
- 2 cups Greek yogurt (plain, thick, high-protein)
- 1 to 1.5 cups milk (low-fat or regular depending on preference)
- 1 to 2 scoops vanilla protein powder (whey or plant-based)
- 2 to 3 tablespoons honey or maple syrup (adjust sweetness)
- 1 teaspoon vanilla extract
- 1 to 2 tablespoons cornstarch or chia seeds (for thickening, optional)
2. Banana layer
- 3 to 4 ripe bananas (sliced)
- Optional: a few drops of lemon juice (prevents browning)
3. Base layer (optional but traditional)
- 1 to 1.5 cups digestive biscuits, graham crackers, or oats
(choose based on preference)
4. Topping (optional)
- Light whipped cream or Greek yogurt
- Crushed nuts (almonds, walnuts)
- Protein cookie crumbs or granola
PART 2: PREPARING THE PROTEIN PUDDING
Step 1: Mix dry protein base
In a bowl:
- Add protein powder
- Add cornstarch or chia seeds (if using)
Mix well to avoid clumps later.
Why:
Protein powder clumps easily if not pre-mixed.
Step 2: Add yogurt and milk
- Add Greek yogurt
- Slowly pour in milk
- Whisk continuously until smooth
The mixture should become thick but pourable.
Step 3: Sweeten and flavor
Add:
- Honey or maple syrup
- Vanilla extract
Mix thoroughly.
Taste and adjust sweetness if needed.
Step 4: Thicken the pudding
Let mixture rest for:
- 10 to 15 minutes
If using chia seeds, it will naturally thicken.
If using cornstarch, you may gently heat it (optional method below).
Optional cooking method (for thicker pudding)
If you prefer traditional pudding texture:
- Pour mixture into a saucepan
- Heat on low flame
- Stir continuously for 5–8 minutes
- Remove when slightly thickened
Do not boil aggressively.
PART 3: PREPARING BANANAS
Step 5: Slice bananas
- Cut bananas into even slices
- Keep some thicker slices for texture
Optional:
- Add a few drops of lemon juice to prevent browning
PART 4: LAYERING THE PUDDING
Step 6: Prepare base layer
In serving dish or glass jar:
- Add crushed biscuits or oats at bottom
- Lightly press to form base
This step is optional but adds texture.
Step 7: First pudding layer
- Add a layer of protein pudding
- Spread evenly
Step 8: Banana layer
- Add sliced bananas evenly over pudding
Step 9: Repeat layers
Repeat:
- Pudding
- Bananas
- Optional biscuit layer
Continue until container is filled.
Top layer should be pudding.
PART 5: TOPPING
Step 10: Add finishing layer
You can top with:
- Light whipped cream or Greek yogurt
- Crushed nuts
- Granola
- Banana slices
Optional:
Dust lightly with cinnamon or cocoa powder.
PART 6: CHILLING
Step 11: Refrigerate
Chill for:
- At least 2–4 hours
- Best overnight
Why:
- Flavors blend together
- Texture becomes thicker and creamier
- Bananas absorb sweetness
PART 7: SERVING
Step 12: Serve cold
Serve directly from fridge.
Best eaten:
- Cold
- Freshly layered or next day
TEXTURE AND FLAVOR RESULT
This high-protein banana pudding will be:
- Creamy and thick
- Naturally sweet
- Slightly tangy from Greek yogurt
- Soft with banana flavor
- High in protein and filling
PROTEIN BENEFITS
Depending on ingredients used:
- Greek yogurt adds high-quality protein
- Protein powder boosts total protein content
- Milk adds additional protein and calcium
This makes it suitable for:
- Fitness diets
- Weight management
- Healthy desserts
- Post-workout snacks
TIPS FOR BEST RESULTS
- Use very ripe bananas for natural sweetness
- Do not overheat yogurt if using cooked method
- Chill long enough for proper texture
- Adjust sweetness after mixing protein powder
- Use thick Greek yogurt for best consistency
COMMON MISTAKES TO AVOID
- Adding too much liquid (makes pudding runny)
- Skipping chilling time
- Overmixing bananas (they turn mushy)
- Using unflavored protein powder without adjusting sweetness