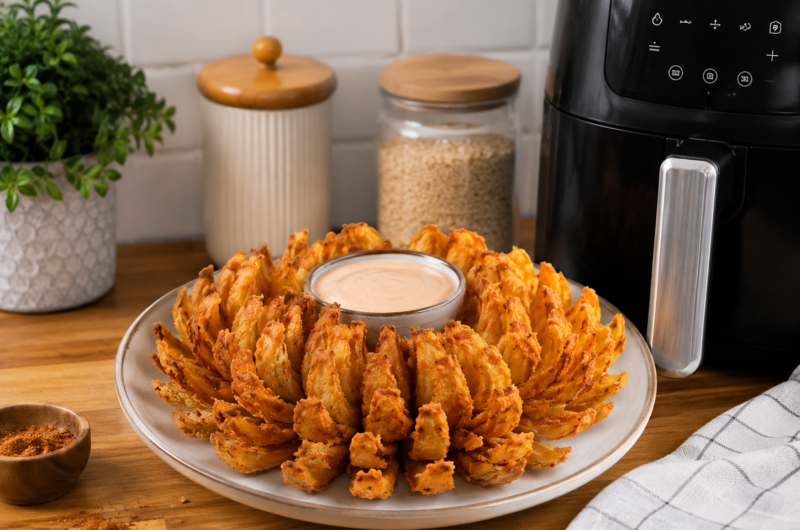
An air fryer blooming onion is a crispy, seasoned onion appetizer that brings the look and flavor of a restaurant-style snack into your home kitchen. A large sweet onion is carefully cut into sections so it opens into separate petals, then coated in a spiced flour mixture and cooked until golden. It is a fun appetizer for game day, family gatherings, parties, or weekend meals.
This homemade blooming onion recipe uses an air fryer instead of deep frying. The onion is coated with flour, eggs, milk, water, and a blend of paprika, cayenne pepper, cumin, thyme, and oregano. Spray oil helps the coating cook and brown while the hot air circulates around the onion.
The result is a crispy air fryer onion with a tender center and flavorful outer petals. Each section can be pulled apart and enjoyed individually. The seasoning adds a slightly smoky, savory taste with gentle heat from cayenne pepper, while the sweet onion becomes softer as it cooks.
Why Make a Blooming Onion in an Air Fryer
A traditional blooming onion is usually deep-fried, but an air fryer provides another way to prepare this popular appetizer. Instead of submerging the coated onion in a large amount of oil, this recipe uses oil from a spray bottle to coat the surface before and during cooking.
The air fryer circulates hot air around the food, helping the breading cook while the onion becomes tender. Spraying the visible flour areas is important because dry flour can remain pale after cooking. Adding spray oil to these areas helps the coating develop a more even appearance.
The air fryer method is also convenient for home cooking because it avoids preparing a large pot of hot frying oil. The recipe still requires careful preparation, especially when cutting and breading the onion, but the actual cooking process is straightforward once the onion is placed in the basket.
Choosing the Best Sweet Onion
A large sweet onion is needed to create the familiar flower-like shape. The onion should be firm, fresh, and large enough to produce wide petals after cutting. The root end must remain intact because it holds the onion sections together during breading and cooking.
Start by cutting approximately 1/2 inch from the top of the onion and removing the outer skin. Keep the root attached. This is one of the most important parts of preparing a blooming onion because cutting too close to the root can cause the petals to separate completely.
Place the onion with the cut side facing down before making the cuts. Begin approximately 1/2 inch away from the root and cut downward until the knife reaches the cutting board. The root should remain uncut so the onion keeps its shape while opening into petals.
How to Cut the Onion Into a Bloom
Make four evenly spaced cuts around the onion. These first cuts divide the onion into larger sections and provide a guide for the remaining cuts. Work carefully and try to keep the cuts similar in size so the finished onion opens as evenly as possible.
After making the first four cuts, create three additional cuts between each main section. This gives you a total of 16 evenly spaced cuts around the onion. The individual sections will later separate into the familiar petals associated with a restaurant-style blooming onion.
Once all the cuts are complete, turn the onion over and allow it to rest for 5 minutes. During this time, the onion petals begin to relax and open naturally. Before coating the onion, gently use your fingers to separate the outer pieces without pulling them away from the root.
Preparing the Seasoned Flour Mixture
The flour mixture creates the crispy coating for this air fryer blooming onion. In a large bowl, whisk together the all-purpose flour, paprika, cayenne pepper, ground cumin, dried thyme, dried oregano, salt, and pepper. Mixing the dry ingredients thoroughly helps spread the seasoning evenly throughout the flour.
Paprika adds color and a mild pepper flavor to the coating. Cayenne pepper brings heat, while cumin adds a warm, earthy taste. Thyme and oregano provide an herbal flavor that works well with the sweetness of the cooked onion.
Salt and pepper should be added to taste, as listed in the original ingredients. Whisking everything together before breading makes the process easier because the onion can be coated with one evenly seasoned flour mixture instead of receiving spices separately.
Making the Egg and Milk Mixture
In a medium deep bowl, whisk together the two large eggs, milk, and water. This liquid mixture acts as the middle layer during breading. It helps the second coating of seasoned flour stick to the onion after the first layer has been applied.
Use a bowl deep enough to hold the onion without damaging the petals. The onion should be coated as evenly as possible, including between the sections. Letting excess liquid drip away before returning the onion to the flour helps prevent the coating from becoming too wet.
The breading process uses the dry flour mixture, followed by the egg mixture, and then the reserved flour mixture again. This double coating helps create a thicker outer layer. Take your time during this process so the flour reaches between the petals rather than coating only the outside.
Coating the Onion With Flour
Place the cut onion in a clean bowl with the cut side facing upward. Pour the seasoned flour mixture over the onion and use a large spoon to distribute it between the petals. The flour should reach as many of the separate sections as possible for a more consistent coating.
After covering the onion, turn it over and gently pat away the excess flour. Do not discard the flour mixture because it will be needed again after the onion is dipped into the egg mixture. Some flour will remain unused when the breading process is complete.
Coating between the petals is important because the onion has many layers and sections. If only the outside receives flour, the center petals may remain less seasoned and less crispy. Work gently so the bloom shape remains intact while you coat the individual sections.
Adding the Egg Mixture
Transfer the floured onion to the egg, milk, and water mixture. Coat it evenly, allowing the liquid to reach between the petals. The first flour layer gives the egg mixture something to cling to and prepares the surface for the final coating.
Lift the onion carefully from the bowl and allow excess liquid to drip off. Too much liquid can make the final flour coating heavy and uneven. Give it a moment to drain before moving the onion back to the bowl containing the reserved seasoned flour.
Handle the onion carefully throughout this step. The petals should stay connected at the root, and rough movement can cause sections to break away. Supporting the onion from underneath makes it easier to move it between bowls without damaging its flower-like shape.
Creating the Second Crispy Coating
Return the onion to the reserved flour mixture after the excess egg mixture has dripped away. Once again, place it cut-side up and use a spoon to cover the onion, paying special attention to the spaces between the petals. This second layer forms the main outer coating.
Gently tap away extra flour after the onion has been coated. A thick amount of loose flour may not cook evenly, so removing the excess helps the surface stay more consistent. There will still be leftover flour after the breading process, which is expected.
The double breading gives the blooming onion its recognizable coated texture. As the onion cooks, the flour mixture firms around the petals while the interior softens. The combination of seasoning and texture makes this appetizer especially suitable for serving with a dipping sauce.
Chilling Before Air Frying
After the onion has been breaded, place it in the refrigerator while the air fryer is prepared. Chilling gives the coating time to settle on the onion. This can make the onion easier to handle before transferring it into the hot air fryer basket.
Keep the onion in a position that protects its shape. Avoid stacking other items on top of it or pressing the petals together. The separate sections need to remain open enough for hot air and spray oil to reach the coated surfaces during cooking.
While the onion is chilling, preheat the air fryer to 350°F. The original recipe recommends preheating for 10 minutes. Starting with a hot air fryer helps begin cooking the coating immediately when the onion is placed inside.
Preparing the Air Fryer for Cooking
Preheat the air fryer to 350°F for 10 minutes. The preheating step gives the appliance time to reach the correct temperature before the onion is added. This is helpful when cooking a large, heavily coated ingredient that needs steady heat.
After preheating, remove the breaded onion from the refrigerator. Spray it generously with oil from the spray bottle, covering the visible flour as evenly as possible. The oil is important for helping dry flour areas cook and develop a more evenly finished surface.
Use the oil in the way described by the recipe rather than pouring additional oil into the basket. A spray bottle allows the surface to be coated while avoiding large pools of oil. Make sure the onion is ready to transfer immediately after spraying.
Using an Aluminum Foil Sling
A blooming onion can be delicate once it has been breaded, so an aluminum foil sling makes transferring it easier. Form a sling from a sheet of aluminum foil that is strong enough to support the onion from underneath during both placement and removal.
Place the onion cut-side up on the foil sling and carefully lower it into the air fryer basket. Keeping the cut side upward allows the petals to remain open and makes it easier for the coating between the sections to receive heat.
The foil sling should be used carefully and should not block more airflow than necessary. The onion still needs exposure to circulating hot air for proper cooking. Its main purpose is to help you lift the cooked onion without breaking apart the delicate petals.
Cooking the Blooming Onion
Set the air fryer timer for 25 minutes at 350°F. During the cooking time, the hot air cooks the seasoned coating while gradually softening the onion inside. The size of the onion and differences between air fryer models can affect the exact appearance and texture.
Spray the onion with cooking oil 2 to 3 times while it cooks. Check for visible areas of dry flour and spray those spots as needed. This step helps the flour coating cook more evenly and reduces the chance of pale, powdery sections remaining on the finished onion.
Avoid unnecessary handling during cooking because the petals can become fragile as the onion softens. If your air fryer requires you to open the basket for spraying, do so carefully and close it again so cooking can continue at the set temperature.
How to Check the Texture
After 25 minutes, carefully remove the blooming onion using the aluminum foil sling. The coating should appear cooked and the onion petals should be tender enough to pull apart. The exact level of browning can vary depending on the air fryer and how evenly the oil was sprayed.
If visible dry flour remains on any part of the onion during cooking, spray that area with oil. Dry flour may stay light in color, while lightly oiled areas generally cook with a more finished appearance. Checking this during the 2 to 3 oil sprays helps improve the final texture.
Once the onion is removed from the air fryer, season it with salt and pepper to taste. Allow it to cool slightly before serving because the interior can remain very hot. The petals can then be pulled apart for easy sharing.
Serving a Restaurant-Style Appetizer at Home
This air fryer blooming onion makes an attractive centerpiece for an appetizer table. Its open shape encourages sharing because each person can pull off a piece. It works particularly well for game day, casual parties, family movie nights, and gatherings where finger foods are served.
The seasoned coating has paprika, cayenne, cumin, thyme, and oregano, giving the onion a mixture of savory, herbal, and lightly spicy flavors. The sweet onion softens as it cooks, creating a contrast between the tender interior and the seasoned coating.
Serve the blooming onion with the blooming onion dip mentioned in the original recipe. A dipping sauce complements the crispy petals and can add a cool or creamy contrast to the seasoned exterior. Place the finished onion on a serving plate while it is still warm.
Storage and Reheating
A blooming onion is best enjoyed soon after cooking because the coating has its freshest texture when served warm. If there are leftovers, cool them and refrigerate them promptly in a suitable covered container.
When reheating, an air fryer can help warm the onion while restoring some texture to the coating. Arrange the leftovers so air can circulate around them. The final texture may not be exactly the same as freshly cooked onion because the breaded surface can soften during storage.
Reheat leftovers until thoroughly hot before serving. Because the onion has many layers, make sure the interior is warmed as well as the outer coating. Avoid repeated reheating, and follow safe food storage practices for any leftovers.
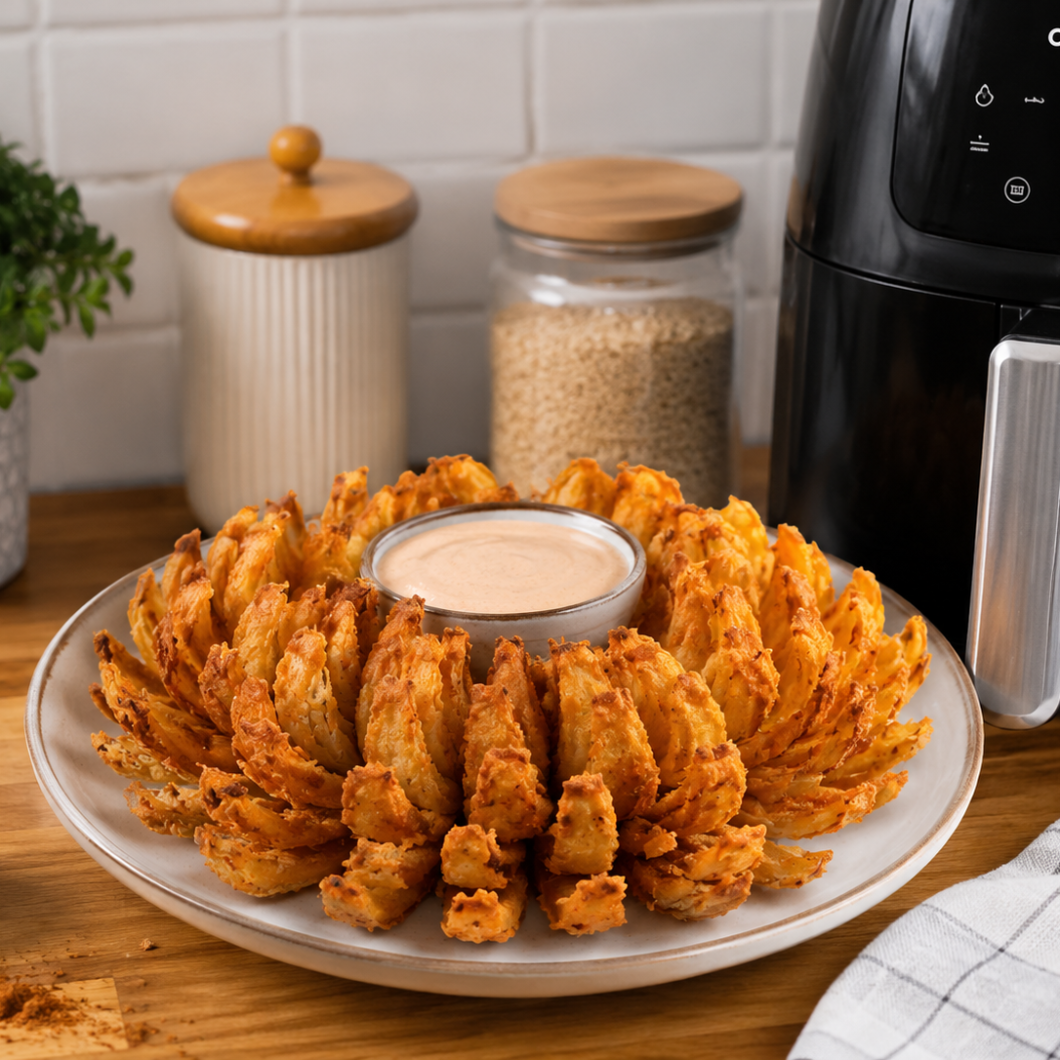
Air Fryer Blooming Onion
 Recipe by admin1
A restaurant-style blooming onion made at home with a large sweet onion, seasoned flour coating, egg mixture, and air fryer cooking. The onion opens into crispy, flavorful petals and is served warm with blooming onion dip.
6
servings10
minutes25
minutes35
minutesIngredients
1 large sweet onion
2 ½ cups all-purpose flour
1 tablespoon paprika
1 teaspoon cayenne pepper
½ teaspoon ground cumin
½ teaspoon dried thyme
2 large eggs
½ teaspoon dried oregano
1 cup milk
1 cup water
Salt and pepper to taste
Oil in a spray bottle
Directions
- Cut 1/2 inch from the top of the sweet onion, peel away the outer skin, and keep the root intact. Place the onion cut-side down and make 16 evenly spaced cuts, beginning about 1/2 inch from the root. Turn it over, let the petals relax for 5 minutes, then gently separate the outer pieces.
- Whisk the all-purpose flour, paprika, cayenne pepper, ground cumin, dried thyme, dried oregano, salt, and pepper in a large bowl. In another deep bowl, whisk together the eggs, milk, and water.
- Place the onion cut-side up in a clean bowl and spoon the flour mixture over it, making sure the flour reaches between the petals. Turn it over and gently pat away excess flour. Dip the onion into the egg mixture, coat evenly, and allow excess liquid to drip off.
- Return the onion to the reserved flour mixture and coat it again, especially between the petals. Gently tap away extra flour, then place the breaded onion in the refrigerator.
- Preheat the air fryer to 350°F for 10 minutes. Remove the onion from the refrigerator, spray generously with oil, and place it cut-side up in the air fryer basket using an aluminum foil sling.
- Cook for 25 minutes, spraying the onion with oil 2–3 times during cooking and covering any visible dry flour. Carefully remove using the foil sling, season with salt and pepper to taste, and serve warm with blooming onion dip.
Nutrition Facts
- Total number of serves: 1
- Calories: 65kcal
- Fat: 7g
- Polyunsaturated Fat: 5g
- Cholesterol: 7mg
- Sodium: 132mg
- Carbohydrates: 1g
- Sugar: 1g