Gluten free dinner rolls are a wonderful addition to almost any meal, especially when you want soft, fluffy bread without traditional wheat flour. These homemade rolls are designed to deliver the tender texture, golden exterior, and buttery flavor that make freshly baked bread so enjoyable.
They are easy enough for everyday cooking but delicious enough to serve at holiday dinners, family gatherings, and special occasions. Whether you follow a gluten-free diet because of celiac disease, gluten sensitivity, or personal preference, homemade gluten free bread can help you enjoy familiar comfort foods again.
One of the best things about this gluten free dinner rolls recipe is its relatively short preparation time. From mixing the dough to taking the finished rolls out of the oven, the entire process takes less than two hours, including proofing. You do not need advanced bread-making skills or complicated techniques to get started. With the right ingredients, a stand mixer, and a little patience, you can prepare a batch of soft dinner rolls that are suitable for serving alongside soups, roasted vegetables, meat dishes, and other favorite meals.
What Makes These Gluten Free Dinner Rolls Special?
A soft and fluffy texture
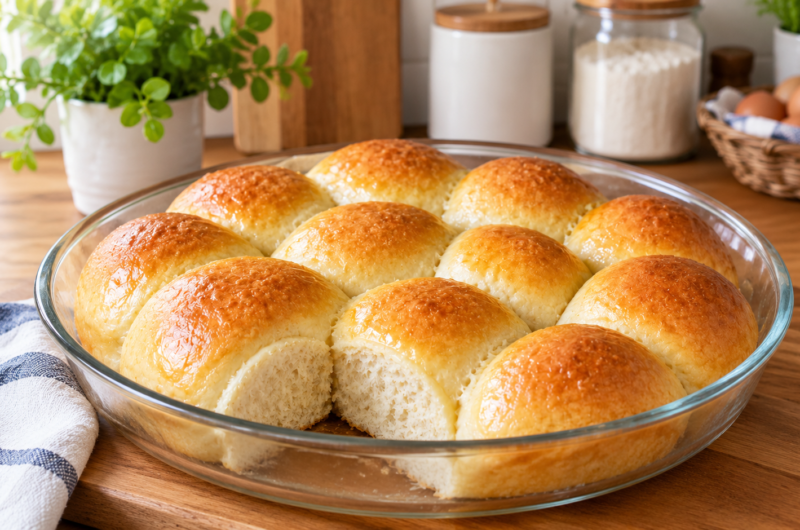
Achieving a light, airy texture can be challenging when baking without wheat flour. Traditional bread relies on gluten to create an elastic structure that traps air during rising. Gluten-free dough behaves differently, which means the balance of ingredients and the mixing process are especially important. This recipe focuses on creating rolls with a delicate interior that feels soft when pulled apart, making them a satisfying alternative to conventional dinner rolls.
The finished rolls have a tender crumb with just a slight chewiness, rather than a dense or crumbly texture. Their crust stays relatively soft while developing an appealing golden color during baking. This combination makes them especially enjoyable when served warm. You can split one open and spread it with butter, or use it to soak up flavorful sauces from your favorite main dishes without feeling as though you are missing out on ordinary bread.
Rich buttery flavor with balanced sweetness
Good dinner rolls should taste delicious on their own, and these gluten free rolls are no exception. Their buttery flavor gives them a comforting richness, while a balanced amount of sweetness and saltiness keeps the taste pleasant without making them resemble dessert bread. This flavor profile works well with both savory and mildly sweet accompaniments, allowing you to serve the rolls in several different ways.
Freshly baked rolls are particularly appealing when the centers are still warm and the butter melts into the soft crumb. For a simple side dish, serve them with salted butter. You can also pair them with creamy soups, vegetable stews, roasted chicken, or a holiday dinner spread. Because their flavor is mild and familiar, they can easily become a regular part of your family’s gluten-free meal rotation.
Why Make Homemade Gluten Free Dinner Rolls?
A practical alternative to store-bought bread
Packaged gluten-free bread products can be useful, but their texture and flavor vary considerably between brands. Some rolls may feel dry, dense, or crumbly, while others may have a texture that is less appealing after storage. Baking at home gives you more control over freshness, serving temperature, and the way your bread is presented. It also allows you to enjoy the smell of freshly baked rolls filling your kitchen.
Homemade gluten free dinner rolls are especially useful when you are preparing a meal for someone who cannot eat gluten. Instead of relying on packaged alternatives, you can bake a batch that is ready to serve alongside the rest of dinner. However, people with celiac disease should make sure that every ingredient is certified gluten-free when necessary and that the mixing bowls, utensils, baking surfaces, and other equipment are free from gluten contamination.
Quick preparation without complicated techniques
Some bread recipes require long rising periods, multiple mixing stages, or several rounds of shaping. These dinner rolls are more approachable because the dough preparation is straightforward. A stand mixer does much of the work, helping combine the ingredients into a consistent dough. After mixing, you simply shape the rolls, allow them to rise, and bake them until they are cooked through and lightly golden.
The short overall preparation time makes this recipe suitable for home cooks who want fresh bread without spending an entire day in the kitchen. Although the process is simple, it is still important to follow the recipe’s measurements and proofing instructions carefully. Gluten-free dough does not behave exactly like wheat-based dough, so changing the ingredients or adding extra flour without a clear reason can affect the final texture.
Ingredients and Their Role in Gluten Free Bread
The ingredients in a gluten free dinner rolls recipe work together to create the right flavor, structure, and moisture level. Because the original ingredient quantities were not included in the supplied recipe description, the exact ingredient list cannot be reproduced accurately here. For the best results, use the complete original ingredient list and measurements rather than substituting ingredients based on guesswork.
Gluten-free flour and dough structure
The gluten-free flour or flour blend is one of the most important components of the recipe. Different blends contain different combinations of starches, grains, and binding ingredients, so they cannot always be exchanged in equal amounts. A flour blend intended for bread baking may behave differently from one designed for cakes or general-purpose cooking. Following the recipe’s specified flour choice helps produce a consistent dough and a soft interior.
If your flour blend contains a binder such as xanthan gum, check whether the recipe requires any additional amount. Adding more than necessary can make baked goods overly gummy, while insufficient binding can contribute to crumbling. For this reason, it is best to use the exact flour product and measurements called for in the complete recipe rather than making several changes at once.
Yeast, moisture, and richness
Yeast helps the dough rise by producing gas during fermentation. This creates the airy texture that distinguishes soft dinner rolls from dense bread. The liquid ingredients help hydrate the gluten-free flour, while fat contributes tenderness and flavor. Sugar, when included in the specified amount, adds sweetness and can support yeast activity. Salt balances the flavor and contributes to the overall taste of the finished bread.
The proportions of these ingredients matter because gluten-free dough depends heavily on moisture balance. Adding too much flour can make the rolls dry, while too much liquid may leave them difficult to shape or cause them to spread excessively. Use the quantities given in the original recipe and measure carefully. If you are new to gluten-free baking, a kitchen scale can be helpful for measuring flour consistently.
How to Store Gluten Free Dinner Rolls
Freshly baked gluten free dinner rolls are best enjoyed while they are soft and fragrant, but leftovers can also be kept for later meals. According to the supplied description, these rolls keep well for approximately two to three days. Store them in an airtight container once they have cooled enough to avoid excessive condensation. Keeping air exposure to a minimum can help prevent the rolls from drying out too quickly.
Before serving leftover rolls, check their texture and freshness. If they have become slightly firm, gentle reheating may make them more pleasant to eat. Heat only the amount you intend to serve, and avoid prolonged heating that could dry out the crumb. Storage conditions, indoor temperature, and moisture levels can all affect how long the rolls remain at their best, so use your judgment and discard any bread showing signs of spoilage.
Serving Ideas for Gluten Free Dinner Rolls
Pair with everyday meals
These soft dinner rolls are versatile enough to accompany a wide range of savory foods. Serve them with vegetable soup, creamy mushroom soup, roasted chicken, baked fish, or a comforting stew. Their mild buttery flavor complements rich sauces without overpowering the main dish. You can also place a basket of warm rolls in the center of the table so everyone can take one as needed.
Include them in special occasions
Gluten free dinner rolls can also be served at holiday gatherings, family celebrations, and shared meals where gluten-free options are needed. Place them alongside roasted vegetables, potatoes, salads, and other sides to create a balanced spread. If you are cooking for someone with celiac disease, take care to keep the rolls separate from ordinary bread and use clean serving utensils to reduce the risk of cross-contact.
Enjoy with simple toppings
A warm roll with salted butter is a straightforward way to enjoy its soft texture and rich flavor. Depending on your preferences and the ingredients used, you can also serve the rolls with a suitable gluten-free spread or alongside savory fillings. If you plan to use them for sandwiches, allow them to cool enough to handle and cut them carefully. Their tenderness makes them particularly appealing when freshness is a priority.
Frequently Asked Questions
Why are my gluten free dinner rolls dense?
Dense rolls can result from inaccurate measurements, insufficient proofing, inactive yeast, or a flour blend that does not suit the recipe. Too much flour can also make the dough dry and restrict the development of a soft crumb. Review the recipe’s measurements and mixing instructions, check the yeast’s freshness, and allow enough time for the dough to rise. Changing only one factor at a time can help you identify the cause.
Can I make these gluten free rolls ahead of time?
Yes. The supplied recipe description indicates that you can prepare the rolls ahead, refrigerate them overnight, and bake them the next day. Follow the original instructions for refrigeration and baking because the correct timing depends on how the dough is prepared. Planning ahead is especially helpful when you need fresh bread for a holiday dinner or a busy family meal.
Do gluten free dinner rolls need to cool completely?
Not necessarily. The supplied description specifically highlights that these rolls are intended to have a soft, light crumb even when served warm. You can enjoy them shortly after baking, once they are safe and comfortable to handle. If you want to slice them neatly for sandwiches, allowing them to rest a little longer may make handling easier.
How long do homemade gluten free dinner rolls last?
These rolls are described as keeping well for two to three days when stored appropriately. Let them cool before placing them in an airtight container, and keep them away from excess moisture. Their texture may gradually change during storage, so reheating a portion gently before serving can help improve the eating experience.
Are these dinner rolls suitable for people with celiac disease?
They can be suitable if every ingredient is gluten-free and the rolls are prepared without cross-contact from wheat, barley, rye, or other gluten-containing foods. Check ingredient labels carefully, use clean equipment and work surfaces, and follow any relevant food-safety requirements. If the flour blend or another ingredient is not verified as gluten-free, do not assume that the finished rolls are safe for someone with celiac disease.
Gluten Free Dinner Rolls
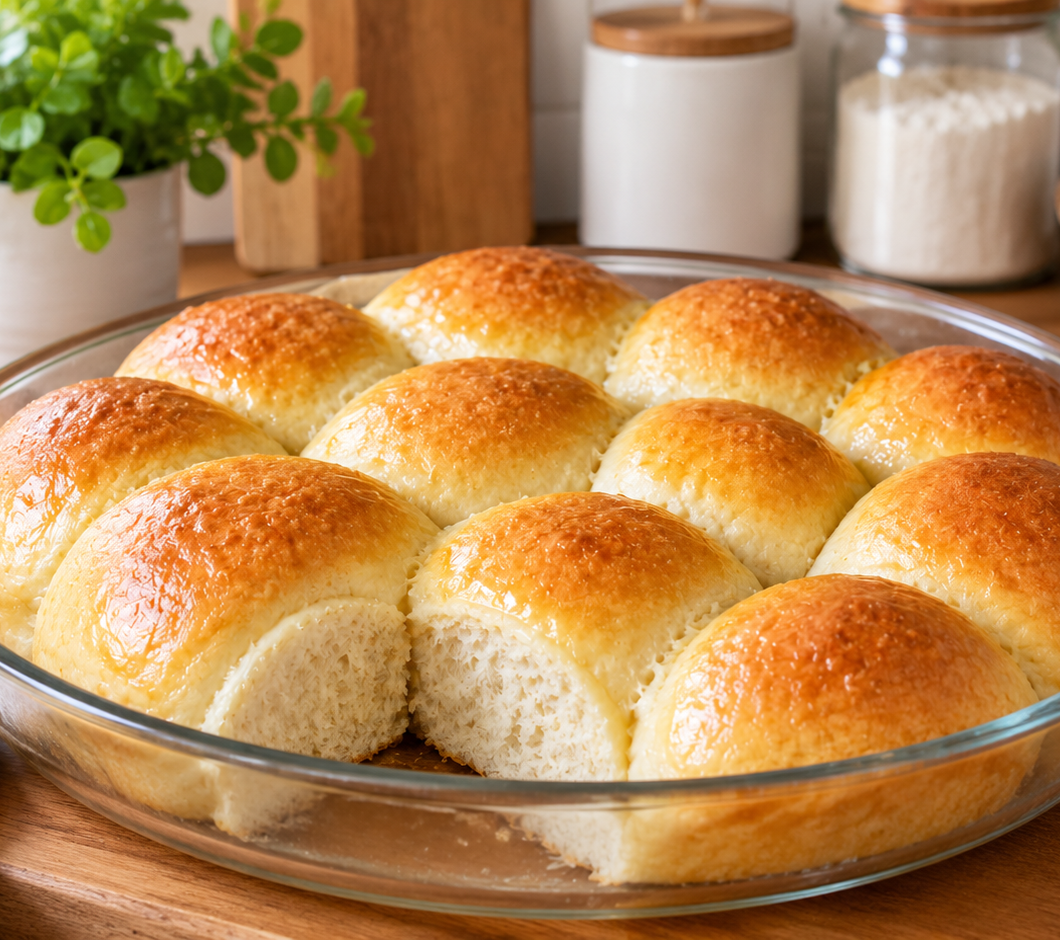
These Gluten Free Dinner Rolls are incredibly soft, fluffy, and buttery with a light, tender crumb that closely resembles traditional homemade dinner rolls. Made with a gluten-free flour blend, tapioca starch, yeast, and simple pantry ingredients,
16
servings30
minutes3
hours113
kcal20
minutes3
hours50
minutesIngredients
- Dry Ingredients
3¼ cups (455 g) all-purpose gluten-free flour blend (Better Batter)
3¼ teaspoons xanthan gum (omit if your flour blend already includes it)
⅞ cup (105 g) tapioca starch (plus extra for lightly dusting the work surface)
4 teaspoons (12 g) instant yeast
¼ cup (50 g) granulated sugar
1 teaspoon kosher salt
- Wet Ingredients
1⅝ cups (13 fluid ounces) warm milk (about 90°F)
8 tablespoons (112 g) unsalted butter, melted and cooled (plus extra melted butter for brushing)
2 egg whites (approximately 50 g, at room temperature)
Directions
- Prepare the Dry Ingredients
Place the gluten-free flour blend, xanthan gum, tapioca starch, instant yeast, and granulated sugar into the bowl of a stand mixer. Whisk until evenly combined, then add the kosher salt and mix once more. - Add the Wet Ingredients
Pour the warm milk, melted butter, and room-temperature egg whites into the dry ingredients. - Mix the Dough
Using the paddle attachment, beat the dough thoroughly. Continue mixing for about 6 minutes until the dough forms a smooth, whipped consistency that pulls away from the sides of the bowl before sticking lightly again. - First Rise
Transfer the dough into a lightly greased bowl or container with a tightly fitting lid. Leave it to rest at room temperature for at least 2 hours, or refrigerate it for up to 24 hours if preparing ahead. - Bring Refrigerated Dough to Room Temperature
If the dough has been refrigerated, leave it covered on the kitchen counter until it reaches room temperature before shaping. - Prepare the Baking Pans
Lightly grease a quarter sheet pan or several round cake pans, depending on whether you prefer pull-apart rolls or individually baked rolls. - Divide the Dough
Divide the dough into 16 equal portions, approximately 2½ ounces each. - Shape the Rolls
Working with one portion at a time, gently knead the dough using clean, dry hands until smooth. Lightly dust the work surface with tapioca starch if necessary, then shape each portion into a smooth round ball. - Arrange the Rolls
Place the shaped dough balls into the prepared baking pan. Position them close together for pull-apart rolls or slightly apart if you prefer individually baked rolls. - Second Rise
Cover the pan loosely with lightly greased plastic wrap and place it in a warm, draft-free location. Allow the rolls to rise until they reach approximately 150% of their original size. - Preheat the Oven
As the rolls finish rising, preheat the oven to 375°F (190°C). - Brush with Butter
Remove the plastic wrap and generously brush every exposed surface of the rolls with melted butter. - Bake
Bake the rolls until an instant-read thermometer inserted into the center reaches approximately 190°F (88°C).
If the rolls are not touching, bake for approximately 20 minutes.
If the rolls are touching, reduce the oven temperature to 350°F after about 18 minutes and continue baking for approximately 5 additional minutes, or until fully cooked. - Finish and Serve
Remove the rolls from the oven and immediately brush them once again with melted butter while they are still hot. Serve warm for the best flavor and texture.