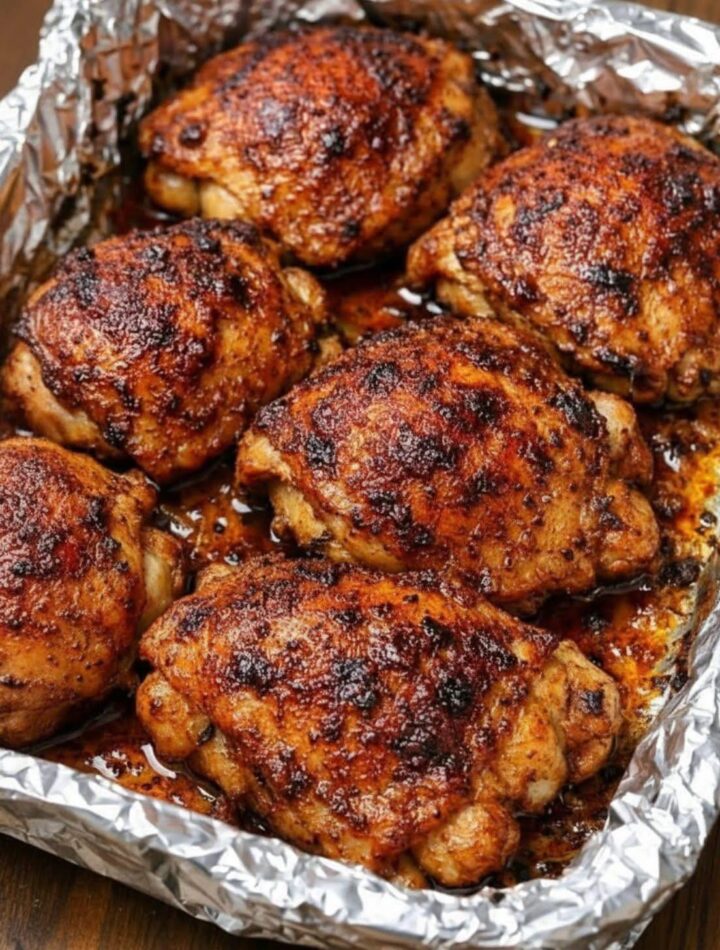
This is a complete guide to making oven-roasted chicken thighs with crispy skin and juicy, tender meat inside. Chicken thighs are ideal for roasting because their higher fat content keeps them moist while the oven renders the skin golden and crisp.
PART 1: INGREDIENTS
1. Chicken
- 6 to 8 chicken thighs (bone-in, skin-on preferred for best crispiness)
2. Basic seasoning
- 2 teaspoons salt (adjust to taste)
- 1 teaspoon black pepper
- 1 teaspoon paprika (adds color and mild smoky flavor)
- 1 teaspoon garlic powder
- 1 teaspoon onion powder
- 1/2 teaspoon dried oregano or thyme
3. Marinade (optional but highly recommended)
- 2 tablespoons olive oil
- 1 tablespoon lemon juice or vinegar
- 3–4 garlic cloves (minced)
- 1 teaspoon mustard (optional, helps tenderize)
4. Optional flavor boosters
- Chili flakes (for heat)
- Honey (for slight caramelized glaze)
- Fresh rosemary or thyme sprigs
- Butter (for basting)
PART 2: PREPARING THE CHICKEN
Step 1: Clean and dry
- Pat chicken thighs completely dry using paper towels
- Make sure skin is as dry as possible
Why:
Dry skin is essential for crispiness. Moisture prevents browning.
Step 2: Score the skin
- Make 1–2 shallow cuts on the skin side
Why:
Helps fat render out and allows seasoning to penetrate deeper.
Step 3: Season or marinate
Option A: Dry seasoning
- Mix all spices
- Rub evenly over chicken, including under skin if possible
Option B: Marinade method
- Mix olive oil, lemon juice, garlic, and mustard
- Coat chicken thoroughly
- Let rest for 1–4 hours in fridge
Step 4: Rest before cooking
- Take chicken out of fridge 20–30 minutes before baking
Why:
Room temperature chicken cooks more evenly.
PART 3: PREPARING THE OVEN
Step 5: Preheat oven
- Preheat to 220°C (425°F)
For extra crispiness:
- Place a baking rack over a tray
- This allows air circulation under chicken
PART 4: ROASTING PROCESS
Step 6: Arrange chicken
- Place chicken thighs skin-side up
- Leave space between pieces
- Do not overcrowd
Why:
Proper spacing ensures even crisping.
Step 7: Initial high-heat roast
- Roast at 220°C for 20–25 minutes
This step:
- Begins skin crisping
- Renders fat under skin
Step 8: Lower heat for cooking through
- Reduce temperature to 190°C (375°F)
- Continue roasting for 20–25 minutes
Chicken should cook fully without burning the skin.
Step 9: Optional basting
Halfway through second stage:
- Spoon pan juices over chicken
or - Brush lightly with melted butter
Why:
Enhances flavor and color.
Step 10: Final crisping
- Switch oven to grill/broil mode for 2–5 minutes
- Watch carefully to avoid burning
This creates extra crispy skin.
PART 5: CHECKING DONENESS
Step 11: Internal temperature
Chicken is done when:
- Internal temperature reaches 75°C (165°F)
Without thermometer:
- Juices run clear
- Meat pulls easily from bone
PART 6: RESTING
Step 12: Rest chicken
- Remove from oven
- Let rest for 5–10 minutes
Why:
Resting keeps juices inside meat instead of running out.
PART 7: SERVING
Step 13: Serve hot
Best served with:
- Roasted vegetables
- Mashed potatoes
- Rice
- Fresh salad
- Garlic bread
Optional:
Drizzle pan juices over chicken for extra flavor.
TEXTURE AND FLAVOR PROFILE
Properly made crispy oven-roasted chicken thighs will be:
- Crispy and golden skin
- Juicy and tender inside
- Well-seasoned throughout
- Slightly smoky and aromatic
- Rich in natural chicken flavor
TIPS FOR BEST RESULTS
- Always dry chicken thoroughly before seasoning
- Use high heat first for crisp skin
- Do not overcrowd the pan
- Let chicken rest after baking
- Use bone-in thighs for maximum juiciness
COMMON MISTAKES TO AVOID
- Baking at low temperature from start (no crisp skin)
- Skipping drying step
- Overcrowding tray
- Overcooking and drying meat
- Not resting after cooking
VARIATIONS
- Garlic butter roasted chicken thighs
- Spicy paprika chili version
- Honey glazed crispy chicken thighs
- Herb-roasted Mediterranean style
- Air fryer crispy chicken thighs alternative